Purpose
Installing M-Files on a PC.
Outcomes
M-Files Application for SimplerQMS has been installed on a PC.
Prerequisites
The PC must comply with the system requirements, see https://www.m-files.com/user-guide/latest/eng/operating_system_requirements.html
Step 1 – Download the M-Files Installation Package
Step 1 – Download the M-Files Installation Package
Go through the following steps to install M-Files:
Open a web browser and go to simplerqms.com/test/. You will be redirected to our file share on SharePoint.
Download the installation file and run it:

Note: After you have downloaded the installation package, you might see different warning messages such as these:

Click Keep and then Keep anyway. Then Run the installation package.
You might see this message:

Click More info and Run anyway.
Step 2 – Install the M-Files Online Application
The M-Files Installation Wizard will appear:
- Click “Next”. The End-User License Agreement will now appear.
- Select “I accept the license agreement” and click “Next”
- Depending on your Windows version and setup, the following dialogue box might appear: “Do you want to allow this app to make changes to your device?” Click Yes. M-Files will now start installing.
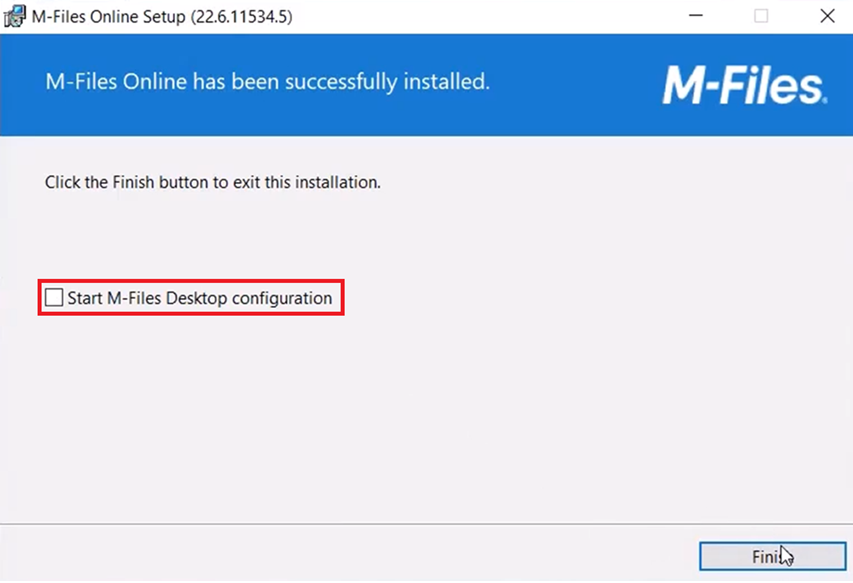
- You will then see: “M-Files has been successfully installed.”
- Untick the checkbox “Start M-Files Desktop configuration.”
Step 3 – Login to SimplerQMS / M-Files
Note: You will only be able to complete this step after receiving your login credentials from SimplerQMS.
You should now see a Microsoft Log-in window:

If you don’t see this window, then go to your desktop and click the M-Files icon.
1. If you previously used another Microsoft account, then click “Use another account”
2. Log in using the credentials you receive from our team members
- Look out for the following:
- The email address should end in “@simplerqmstest2.com”
3. Wait for this dialogue box to appear (this can take up to 20 sec.):

4. Click Allow. The M-Files Applications has now been installed and will now open.
The Sandbox Environment is now ready for use.
If you have already installed M-Files Online and the vault is empty, proceed to step 4. Otherwise, no further action is required.
Step 4 – Adding a New Vault/Adding New Connection
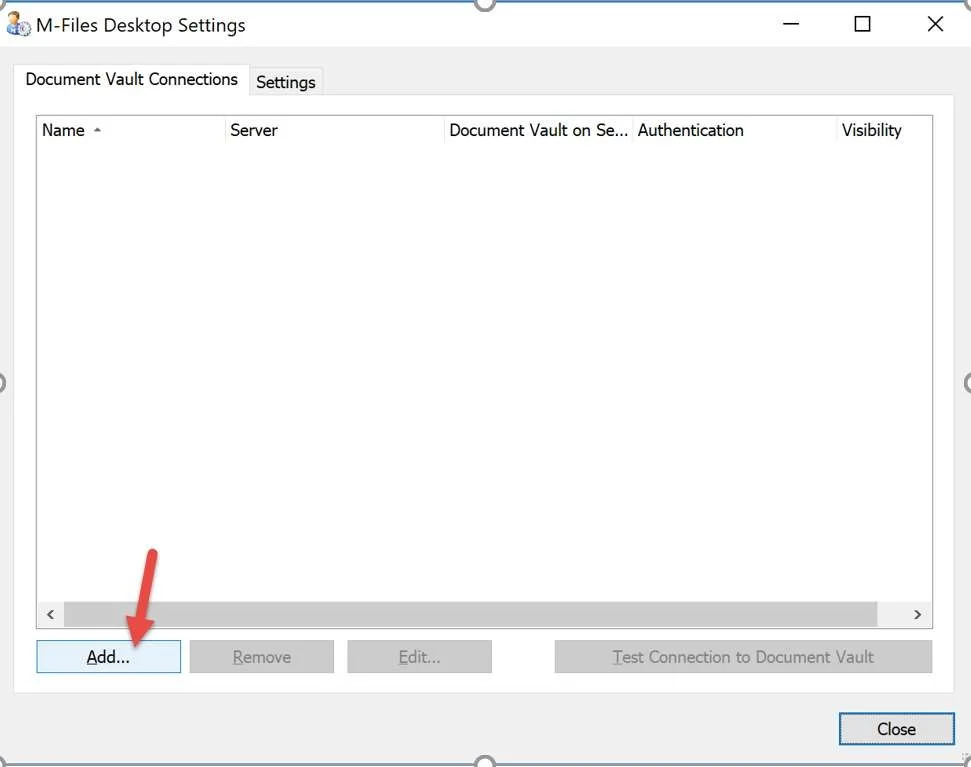
You should now see the following box:
Click Add.
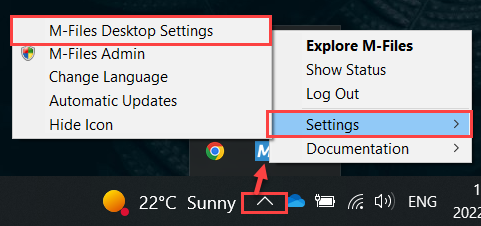
If you don’t see the M-Files Desktop Settings box as shown above, then right-click on the M-icon in the Windows Hidden Icons Tray at the bottom right of your screen. Then click Settings > M-Files Desktop Settings.
Step 5 – Setting up the SimplerQMS Training Vault
This vault is used for training in the different SimplerQMS modules. This is a shared vault across all customers, so make sure that you do not upload anything confidential once you gain access.
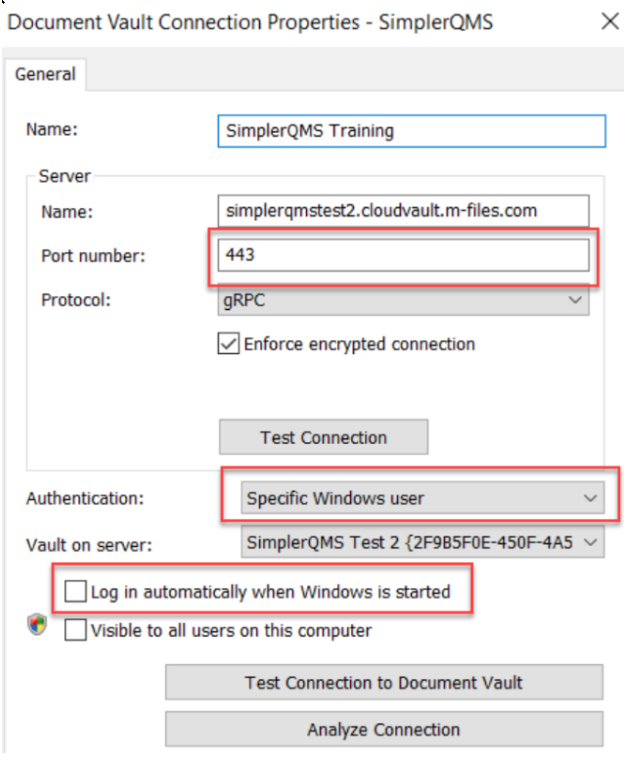
- Into the window that opens after clicking on “Add”, input the following information:
- Name: SimplerQMS Training
- Server Name: simplerqmstest2.cloudvault.m-files.com
- Port Number: 443
- Protocol: gRPC
- Test the Connection by clicking on “Test Connection”
- this should say it succeeded to confirm that all the details above are correct
- Set the Authentication to: Specific Windows User
- Remove the Check mark in “Log in automatically when Windows is started”
5. Click on the empty drop-down next to “Vault on Server”. A Microsoft Log-in window will open:
6. If you previously used another Microsoft account, then click “Use another account”
7. Log in using the credentials you receive from our team members
- Look out for the following:
- The email address should end in “@simplerqmstest2.com”
- Your password will need to be set after entering the temporary password you have received from us
8. After log-in the “Vault on the server” will display ‘SimplerQMS Test 2’. Select this option
9. Click OK to save the Vault Connection
10. Click Close to close the Vault Connections box.